
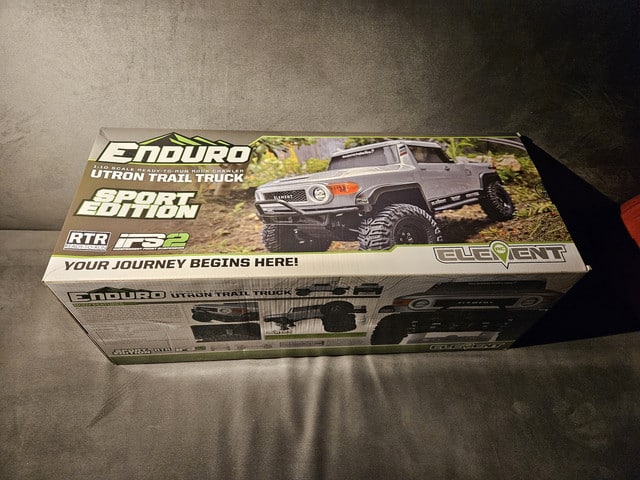
Strangely, to introduce the new version of its independent suspension system, which corrects the geometry defects of the previous version, ElementRC has opted for its low-cost SE platform, with a body that is atypical to say the least… pay attention to your wishes, this is what happens by crying out for something other than the usual Jeeps and Toyotas…
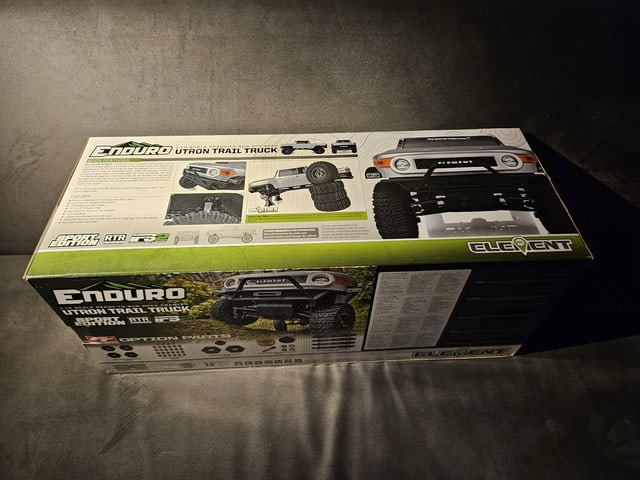
Classic packaging on the exterior, showing the vehicle’s features and options, as well as explosions of the transmission and front axle.
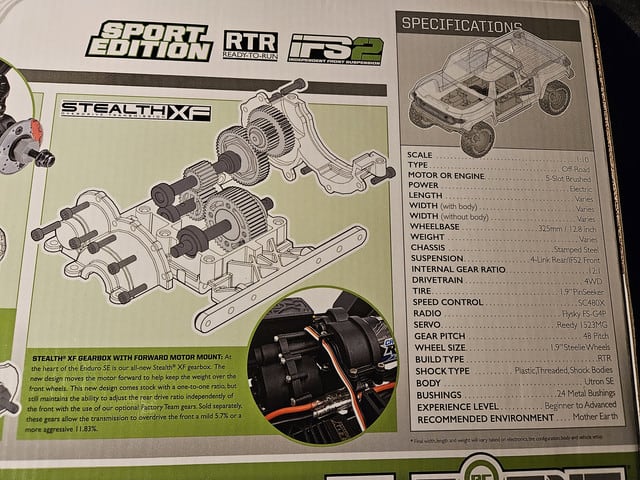
No mention of overdrive… yet possible but unavailable in the form of an upgrade kit, you will have to pick the few components by yourself from the parts of the non-SE versions, because even if the transmission is a new version on the outside, inside, it remains compatible.
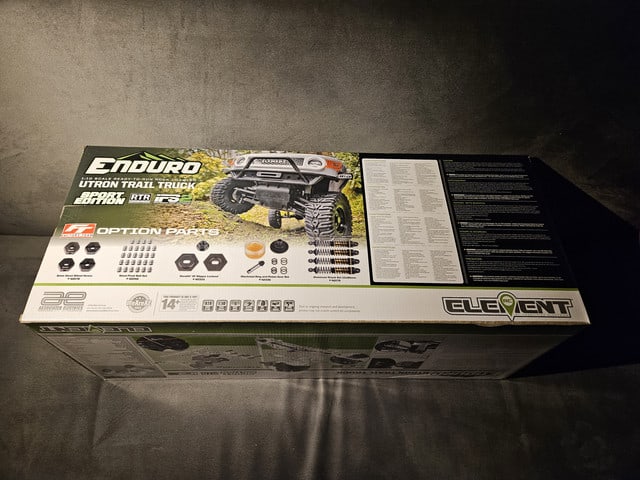
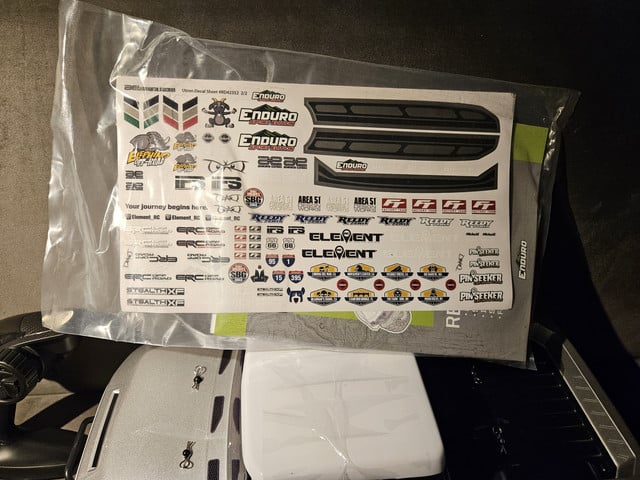
Of course, it wouldn’t be an ElementRC without the garage inside the box.

For an RTR, there are a few bits and pieces in addition to the vehicle and its radio (FlySky 4ch). glossy manual, half-cut sticker sheet, a long battery holder, a chassis brace, rear body posts and some parts to convert the shock absorbers into adjustable shock absorbers.
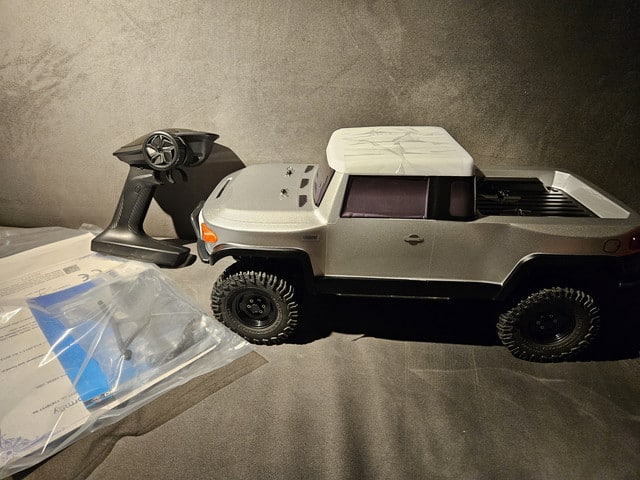
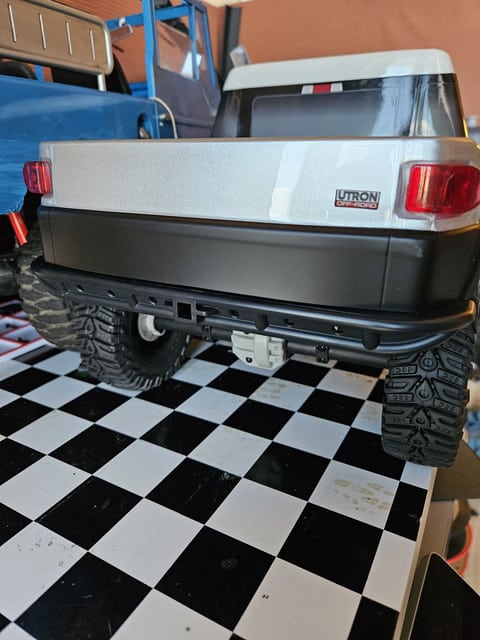
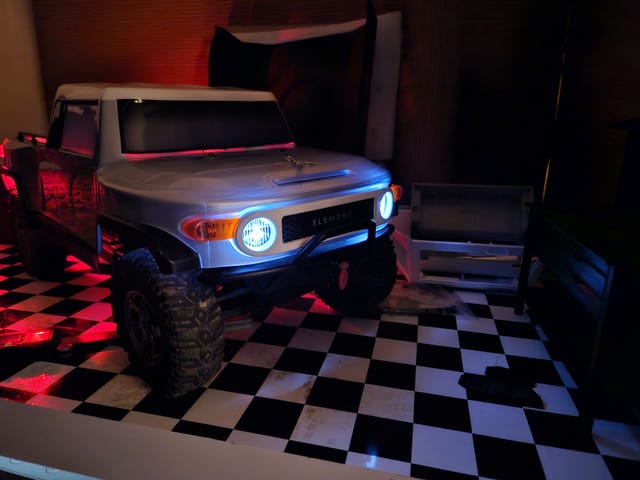
The body lines capture the finesse of the FJ Cruiser (without license), with a little extra, a conversion into a pick-up with a balance that is not necessarily very happy… but realistic, because yes, this conversion was carried out in 1:1 by an individual. Given the price range, the windows are opaque, but the front is pre-equipped for lighting, unlike the rear despite the added lights.
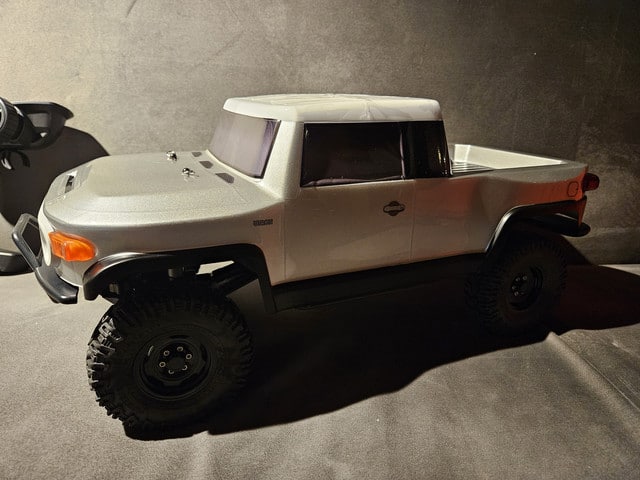

The imbalance mainly comes from the fact that ElementRC chose to keep the rear quarter windows. Without this, the wheelbase would have been shorter but the result can be more uniform.
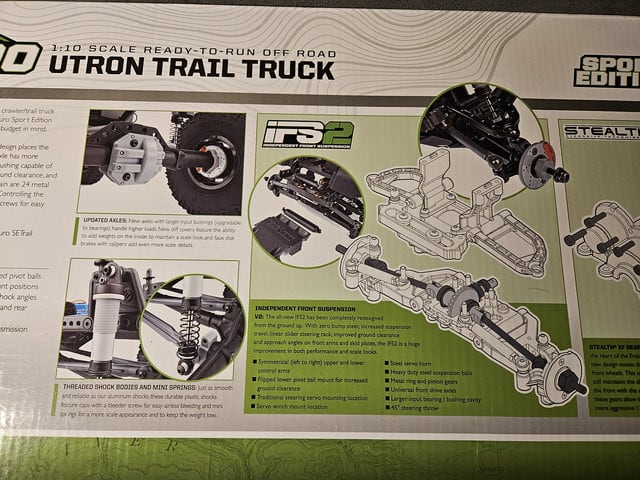
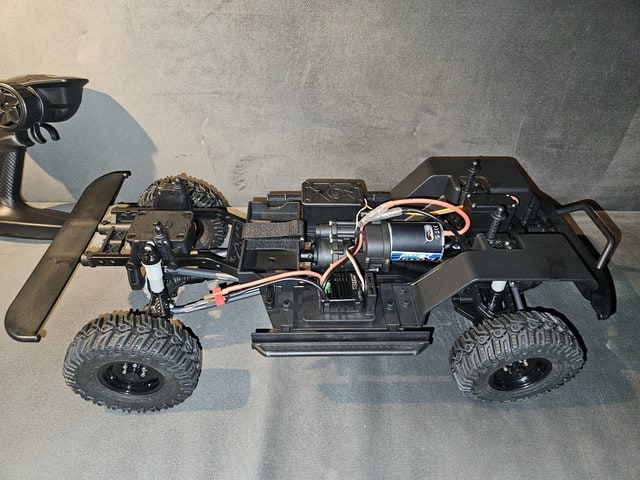
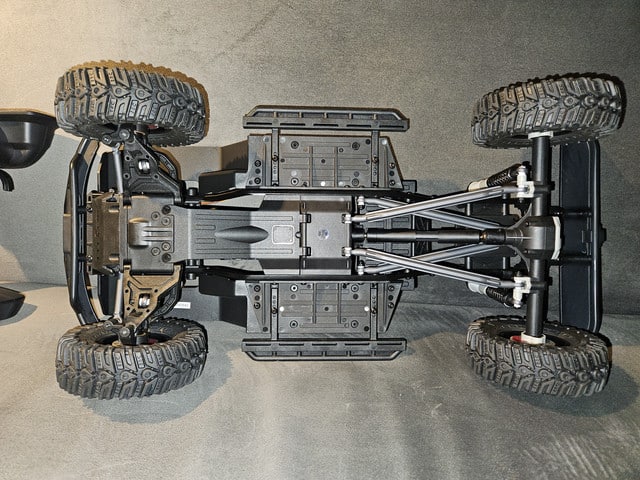
The chassis is in a long 324mm wheelbase.
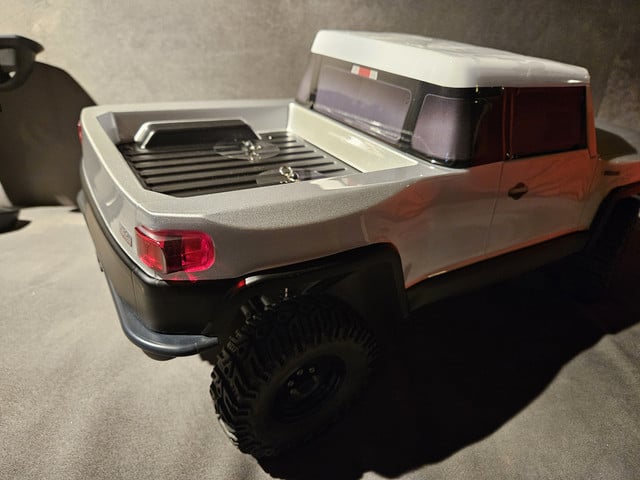
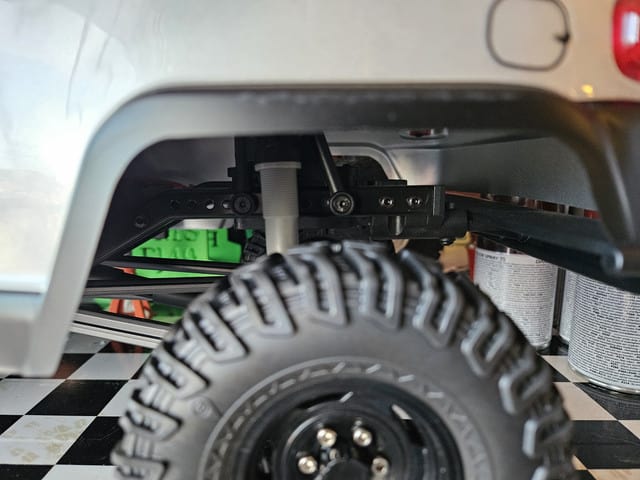
If the front has inner fenders, the rear must do without them. Knight Customs once offered a set of parts to print yourself which included, among other things, rear inner fenders … unfortunately, the reference no longer seems to be available.
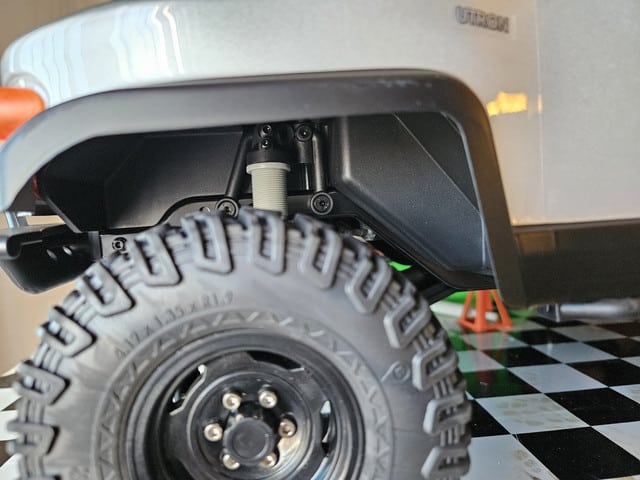
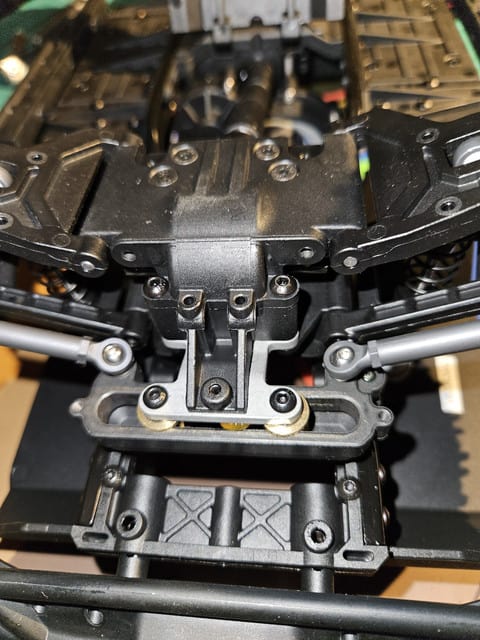
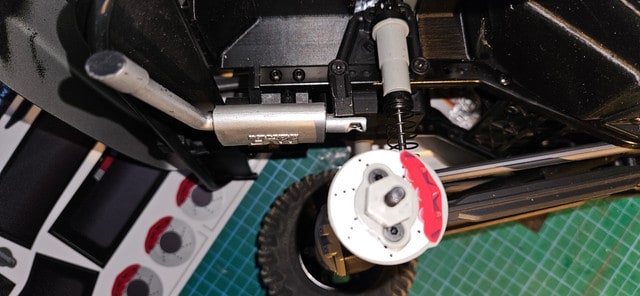
Being an SE version, the rear links are made of plastic and will not put their Axial equivalent to shame in terms of flexibility. If not very efficient, they will be very enduring.
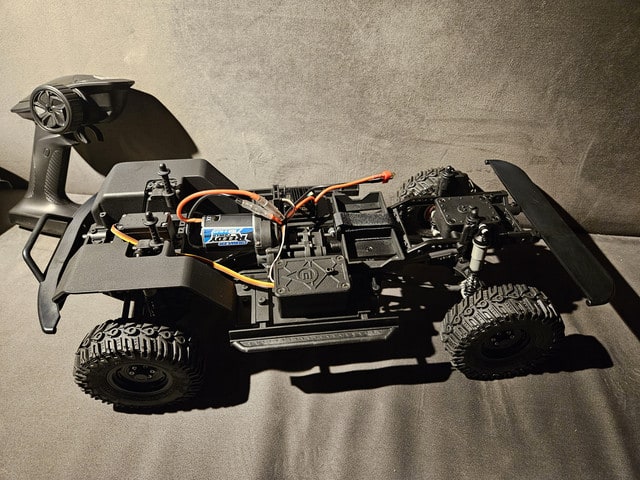
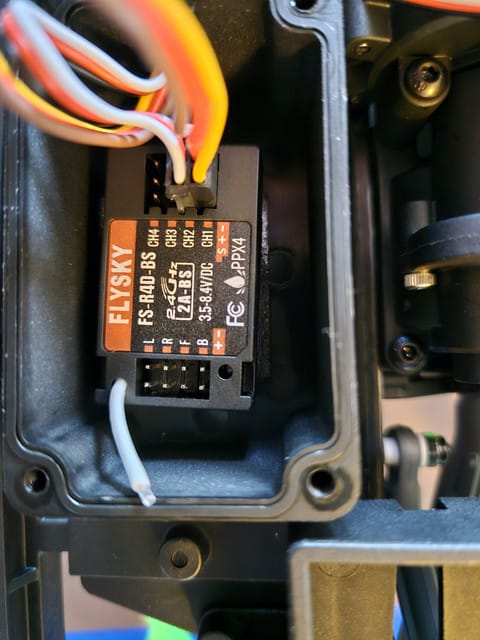
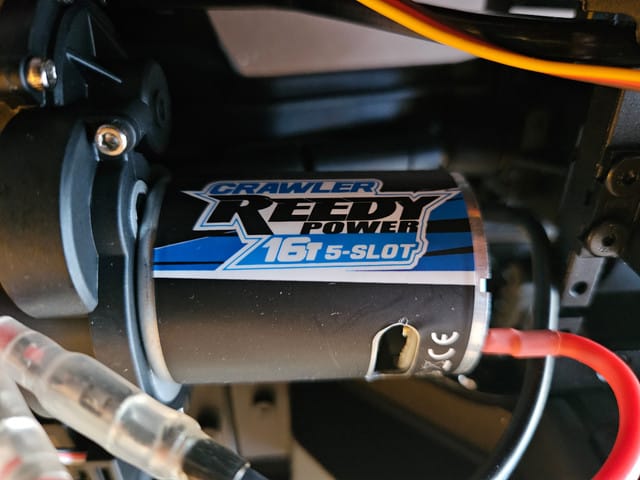
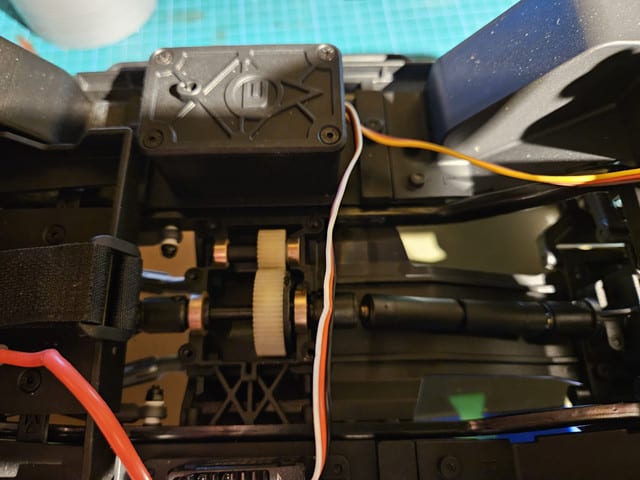
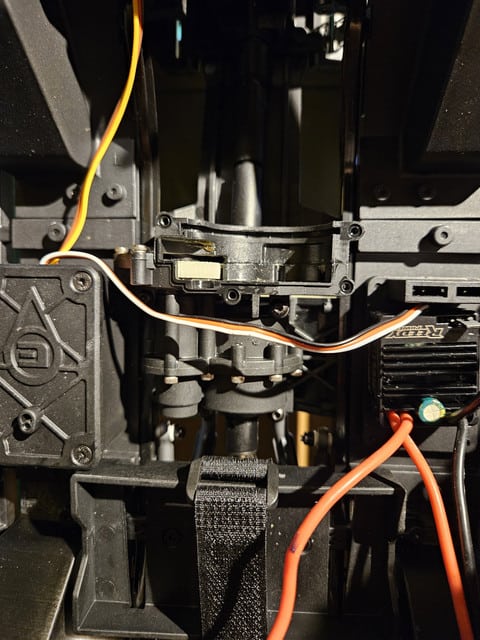
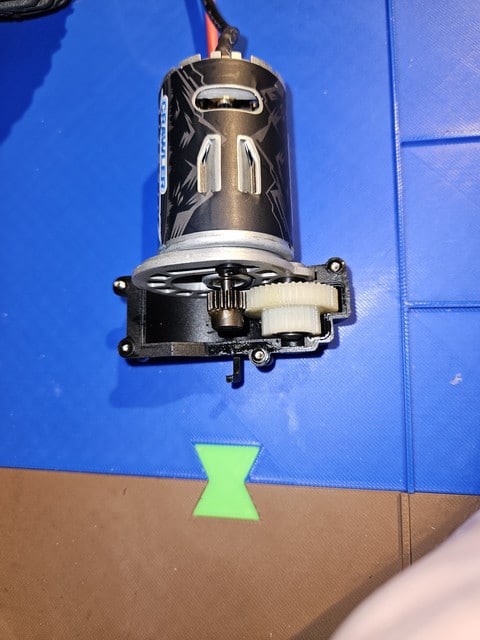
The electronics are “in-house” (Reedy), with a 15kg metal gear servo, a 16T 5-slot motor, the SC480X, an ESC with interesting specs for an RTR one, and a FlySky receiver with a few ports for basic lighting (front, rear and the infamous flashers). If all the electronics are waterproof, this is not the case for the receiver which is housed in a box waterproofed with a pair of joints, but whose antenna hole is … open.
If necessary, the rear “tank” can accommodate a more advanced lighting module, any other electronic accessory that will fit inside or weights.
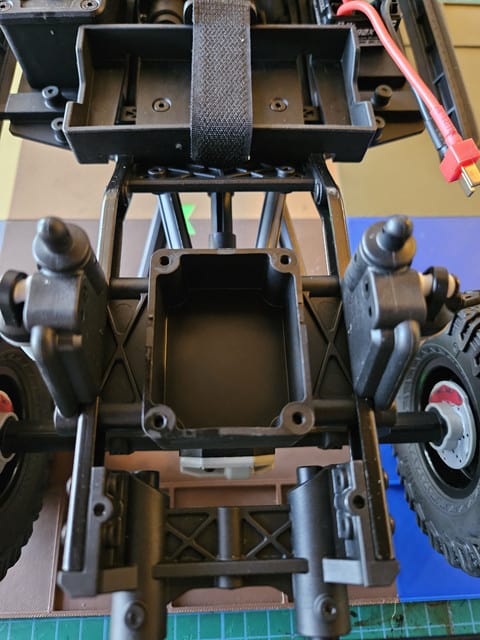
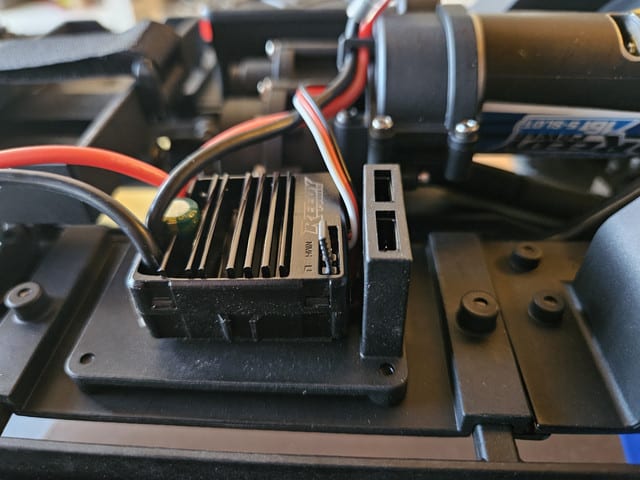
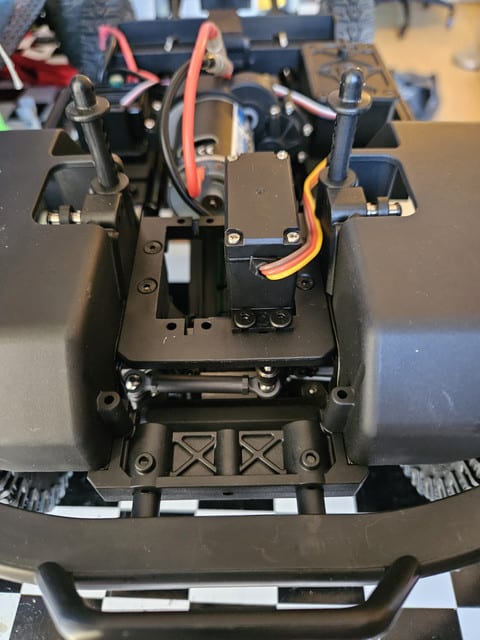
The ESC is not installed directly to the slider but on a small pedestal which hides the 2 wires used to power electrical accessories, as long as they support the 7.4v of the BEC. The steering servo is mounted longitudinally on the chassis, with plenty of space aside suitable for a servo winch.
The ESC specifications are not bad for an RTR ESC, we are far from the 1040 and 1060 Hobbywing. It is even adjustable as long as you have the optional card.
Cells: 2-3 LiPo, 5-9 NiMH
Current (A): 80 cont./320 burst
Motor Limit, 2S LiPo/5-6 NiMH: 540/550 12T 3-slot; 8T 5-slot
Motor Limit, 3S LiPo/7-9 NiMH: 540/550 15T 3-slot; 10T 5-slot
BEC: 7.4V/5A
With the optional card, you can play with some parameters (* = default setting)
Initial Drive 2%, 5%*, 10%, 15%
Low Voltage Cutoff (V/cell) 3.2, 3.3, 3.4*
Drag Brake 0%, 50%, 75%, 100%*
Max Reverse Power 50%, 75%*, 100%
Punch Control Soft*, Medium, Strong
A Max Reverse set at 50% wouldn’t hurt.
The shock absorbers are plastic, non-adjustable, with small springs only under the body. They don’t look much like that but they’re pretty good.

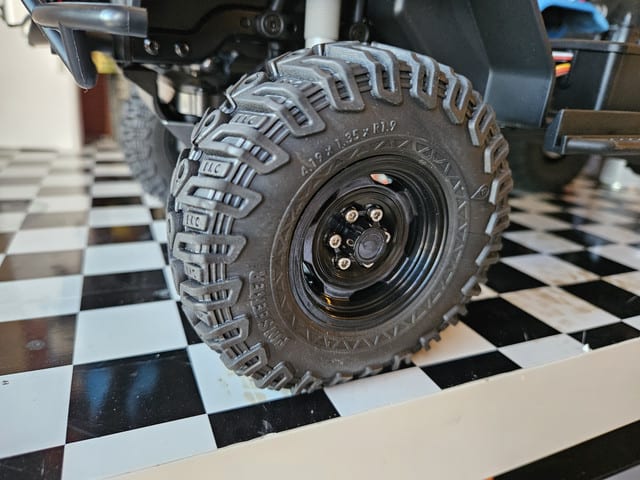
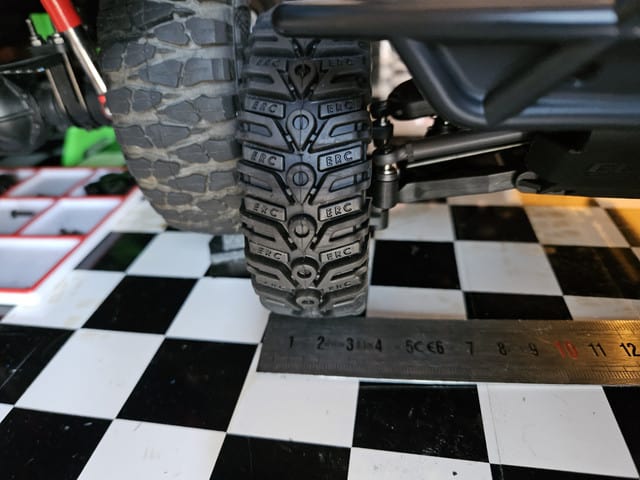
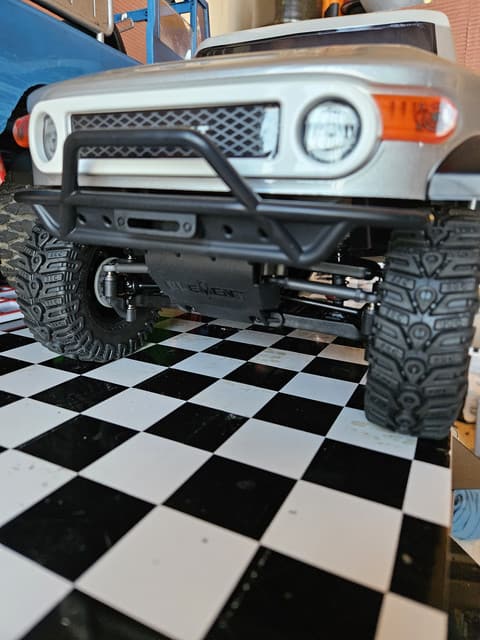
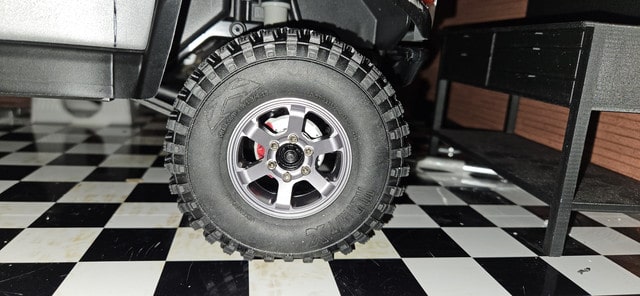
If the beadlock rims are very sober, they fit well with the look of the body, the tires are a little special. They are 1.9 with a diameter of 105mm and a width of 36mm, seem rather effective and leave a mark like no other… a good way to find your way in the forest 😀
The whole thing is visually homogeneous, with a non-adjustable height due to the shock absorbers. The bumpers are very well designed and fit perfectly into the general look. On the other hand, the absence of the rear inner fenders is particularly noticeable

At first glance, the gearbox appears to be accessible. This will make it easy to replace the bronze bushings when the time comes… SE finish obliges, there is not a single bearing on the chassis, except perhaps in the engine, without warranty. Switching to overdrive will only require 5 screws to access the parts to be replaced/added… where it gets tricky is to adjust the slipper, it’s better to anticipate than have to do it in the field, because you have to first drop the engine bracket and if we have not directly removed the entire gearbox from the skid, play gynecologist to dismantle the cover… when it would have been enough for them to modify the mold of the cover to add an opening to the place du “Pin”, as others do, or did.

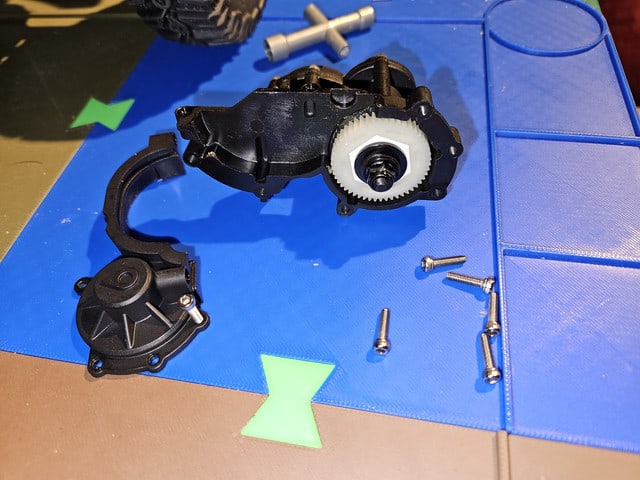
As for the axles gears, access to the rear one is not rocket science, but plan your lubrication in advance for the IFS, there are a bunch of screws involved.
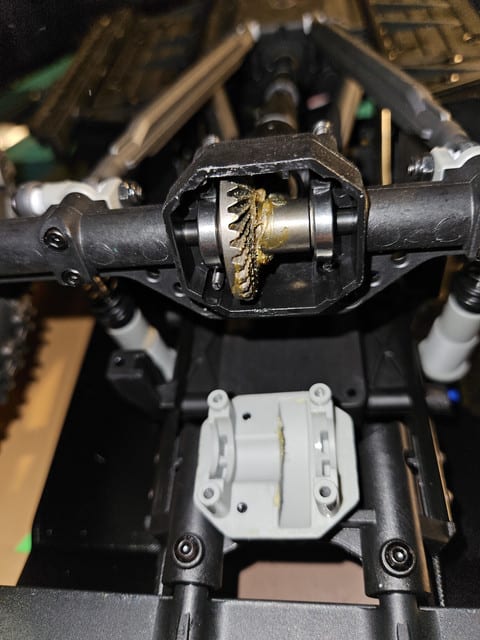
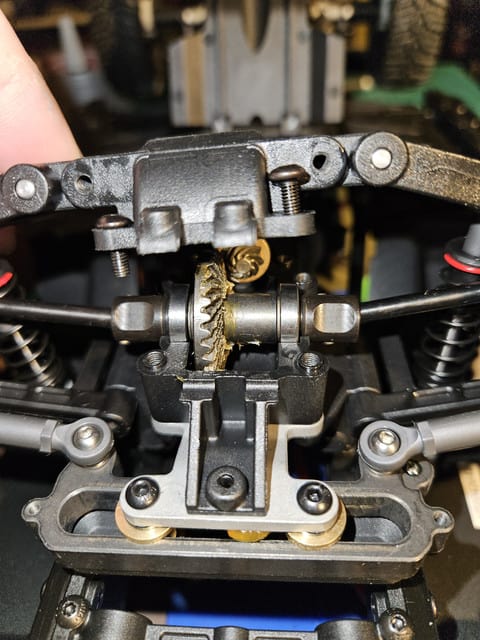
The original lubrication is correct, no real need to add more. BTW, these are the only bearings I’ve seen in the whole truck.
With a 2S 4400mAh battery, it remains a fairly light vehicle which will be less likely to dig into the earth at the foot of rocks.
Total weight: 2k480
Front weight: 1k380
Rear weight: 1k038
This gives a ratio of 57/43, which is rather good, especially since the battery is on the rear, sideways.
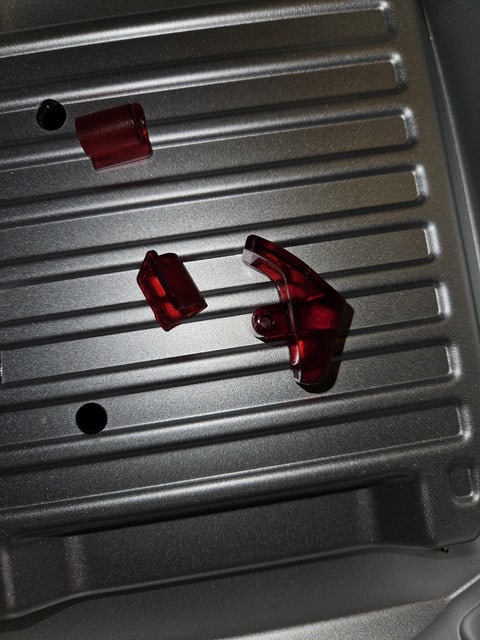
As much for adding lighting on the front, everything is ready, for the rear, it requires a little skill… otherwise you risk leaving a finger there. The rear optical units are in 2 parts, but have no place to install an LED. Fortunately, there is a way, by taking care to check several times before launching the Dremel, you can remove part of the lug that fits into the bodywork to make room for an LED, an LED that will have been planed . It doesn’t replace a block designed for it but it gives the illusion of a pair of working lights, it’s always nicer.
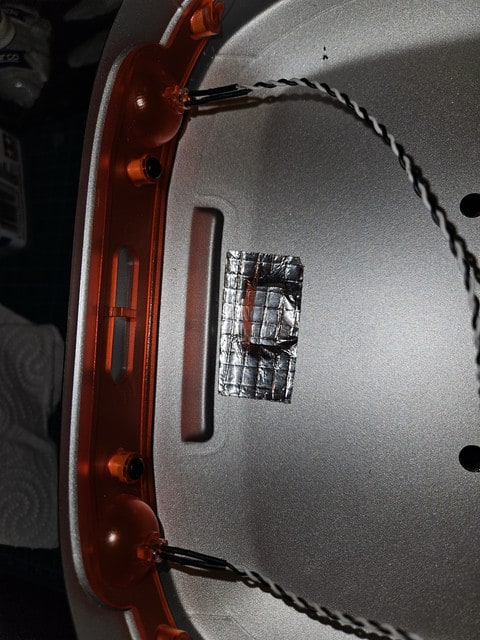
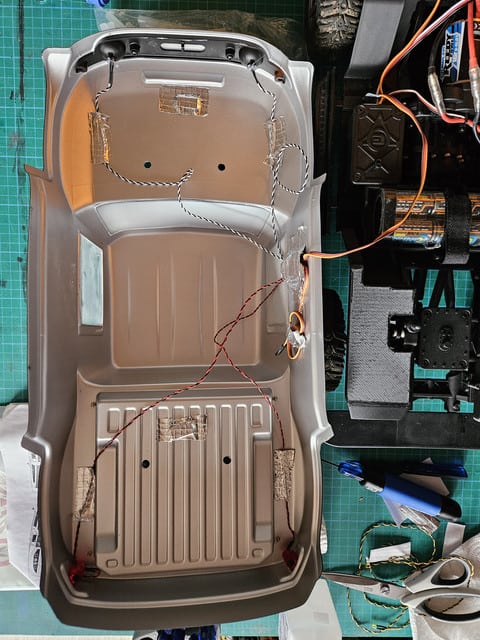

(the pieces of tape at the front of the body and the bed are simply for magnets which avoid having to run after the body pins).
To obtain good lighting at the front, you will nevertheless have to remove the paint behind the stickers, and remember to spray the interior with black spray to avoid spills like in these photos in progress.

If like me you change for more opened wheels, the sticker sheet will provides you the outerside sticker for the brakes, ElementRC having only taken care to install them on the insides. And by digging into the accessories of other Elements products, you will find an exhaust that will require very little adaptation.
And if you install a servo winch, because you cannot add preload to the front shock absorbers, you could find yourself having to ballast the rear of the chassis to find a horizontal line. It’s counterproductive for performance, but more aesthetic.
